Skip to content
  • Official proclamations, rules, and announcements from the Captain-General of Mercenary Scum, Willmark. The heart of the camp — treat it with respect… or at least pretend.

    4 4
    4 Topics
    4 Posts
    WillmarkW
    Never fear folks, I've been tied up in real life for quite some time but hope to be back more in the future. Spread the word as the Dogs of War march again!
  • Grab a mug of ale and introduce yourself to the gathering of sell-swords, cutthroats and general riff-raff. Whether returning from afar or brand new, stop here first.

    8 15
    8 Topics
    15 Posts
    C
    How to Unlock Silksong's Hidden Act 3 Without Missing 25% of the Game Hollow Knight: Silksong Act 3 guide reveals hidden quests and Silk and Soul wish requirements for unlocking Pharloom's secrets. Most players who roll credits in Hollow Knight: Silksong probably pat themselves on the back, believing they’ve seen everything Pharloom has to offer. Then the save file sits there, quietly judging them. The truth? They may have only finished about 75% of the game. Team Cherry tucked an entire Act 3 behind a chain of obscure chores, a few soul-collection errands, and one delightfully sneaky final choice. This guide breaks down the whole process, so nobody has to wander around Weavenest Atla wondering why the walls look so suspicious. Act 3 Requirements First things first: unlocking Act 3 is less about raw skill and more about not sprinting to the finish line like a startled Grub. A player needs to tick off a few boxes before the Caretaker even thinks about handing over the good stuff. Wish upon a star (or several): Complete most, if not all, of the wishes available in Bone Bottom, Bellhart, and the Choral Chambers in the Citadel. Some of these only wake up after certain side quests progress, so a little backtracking is basically a personality trait here. Flea market: No, not actual shopping. Hornet needs to round up enough fleas across the world for the caravan to haul itself over to the Putrified Ducts. She doesn’t need every single one, but a bit more than half keeps the wheels greased. Lace, but make it dramatic: Defeat Lace in The Cradle. Fighting her won’t slam the door on Act 3—it actually swings it wide open. Once those requirements are handled, the Caretaker at the first shrine stops being cryptic and finally offers the last wish: Silk and Soul. Silk and Soul Wish This wish is basically an interdimensional grocery run. Hornet zips through the world to collect souls and items from specific, slightly odd characters. Two of them might already be sitting in her inventory by the time the quest starts, which is a nice little head start. Item / Soul Location Combat Required? Snare Setter Weavenest Atla secret nook No Maiden’s Soul Moss Grotto, starting area west No Hermit’s Soul Bellhart, east secret passage No Seeker’s Soul Bilehaven, after Groal the Great Yes Snare Setter The Snare Setter is a bashful little gadget hiding in Weavenest Atla, which sits below Bone Bottom and east of Moss Grotto. Any player who enjoys poking into corners has probably been here before—Eva hangs out nearby, offering persistent upgrades that make Hornet feel like a fully kitted-out needle warrior. To reach the item, Hornet needs the double jump from Mount Fay. No double jump, no secret room. She should travel down, use the Needolin to play a song at the door, take the elevator to the bottom level, and head right. Instead of blundering into the next room, she can hop up the wall to the second level and slip through the left door. Right before the pond, a double jump reveals a secret area, and there the Snare Setter waits on a small podium like a shy trophy. Maiden’s Soul While she’s in the neighborhood, Hornet can head back to the top of Moss Grotto and then west to the very spot where the adventure began. The Chapel Maid is hanging around, probably wondering why nobody visits. One chat later, she happily hands over her soul. Easy peasy. Hermit’s Soul The Bell Hermit in Bellhart is about as cheerful as a wet charm notch, but he’s surprisingly generous when Hornet asks for his soul. She just needs to find the secret passage east of the fast travel station. A quick conversation, and the grumpy old man parts with it like a man donating a coat he never liked anyway. Seeker’s Soul Now the errand list gets spicy. The Seeker’s Soul demands actual combat. Hornet has to take down Groal the Great, the final boss of the Bilewater region, at the top of Bilehaven. Yeah, that means trudging through a whole network of nasty, maggot-infested waters first. No pressure. After slaying Groal, she hops up to the left and enters the little house just outside the arena. Inside, the Seeker’s Soul lies on the ground beneath the strung-up Seeker, which is grim but also conveniently placed. Setting the Trap With all the ingredients stuffed into Hornet’s inventory, the next stop is the First Shrine. Talking to the Caretaker completes the wish, and the path forward becomes clear: climb The Cradle, speak to the Caretaker at the top, and march into the final boss fight. The clever part comes after defeating Grand Mother Silk. The game offers two choices: Bind or Needolin. Bind: End the game right there, roll credits, and accidentally lock out Act 3 for that playthrough. Oops. Needolin: Spring the trap. Grand Mother Silk and Lace get unceremoniously dragged into the Abyss. It’s dramatic, a little mean, and exactly what the story ordered. After the credits, the save file doesn’t look quite right. Black threads coil around it like an overprotective spider. Cutting away at it with the confirm button unlocks Act 3, and suddenly the game isn’t over at all. So the takeaway is simple: don’t rush the finale. Do the wishes, find the fleas, be nice to the Chapel Maid, and keep that Needolin handy. Act 3 has been hiding in plain sight, waiting for someone patient enough to poke it with a needle. For players who enjoy uncovering every hidden nook and secret timeline, being patient doesn’t just apply to in-game mechanics—it also pays off when planning the next purchase. A game as rich as Hollow Knight: Silksong rewards careful observation, but staying updated on launch discounts, special editions, or rare merchandise can take the same kind of vigilance. After all, none of those DLC reveals or collector’s editions will find their way into your cart by themselves. Rather than refreshing store pages every single day, let [this price tracking tool]( keep an eye on price drops and restocks for you. That way, you can spend more time studying the secrets of Pharloom and less time bargain hunting—and when the next surprise update arrives, you’ll already be ready to dive back in. https://dealnesthq.com
  • The general meeting hall for mercenaries to gather, swap tales, discuss wider events, (aka the general "Off Topic" Forum).

    3 5
    3 Topics
    5 Posts
    WillmarkW
    As it "says on the tin" two of my favorite resources: if you are like me and a fan of Oldhammer: https://forum.oldhammer.org/ "Ahem" my blog which covers not only Warhammer but rolepaying games and other topics: https://thedarksideofwillmark.blogspot.com/
  • Discussion of WFRP across all editions — rules, campaigns, characters, and misadventures. A gathering place for rat-catchers, sellswords, duelists, and other doomed souls wandering the grim and perilous Old World.

    3 3
    3 Topics
    3 Posts
    WillmarkW
    I've been working on one (more details to follow) but I wonder why it never caught on like it did in say D&D?
  • The Marketplace. Buy, sell, trade, and hire — but mind your purse. All transactions are between private individuals. The Tavern and its Captain accept no responsibility for deals, losses, disputes, or scoundrels. Proceed at your own risk.

    1 1
    1 Topics
    1 Posts
    WillmarkW
    By entering, posting in, reading, browsing, glancing at, or even contemplating the Dogs of War Tavern Marketplace (hereafter “THE CONTRACT BOARD”), the user (“YOU,” “THE TRADER,” “THE FOOLHARDY PARTICIPANT”) hereby agrees to the following binding, irrevocable, ironclad, parchment-bound terms, without limitation, reservation, protestation, or muttered complaint: SECTION I — NATURE OF THE CONTRACT BOARD THE CONTRACT BOARD is provided as a casual community venue for private, non-commercial exchange of hobby-related goods, including but not limited to: miniatures, kits, bits, books, sprues, relics of unknown providence, and objects of questionable resin integrity. THE CONTRACT BOARD is not: an auction house, a trading post sanctioned by any sovereign power, a Tilean mercantile guild, nor legally recognized by any authority outside this forum (including but not limited to: courts, magistrates, inquisitions, witch hunters, or Paymasters’ Unions). THE CONTRACT BOARD operates under the ancient principle of CAVEAT EMPTOR (“buyer beware”) and its equally beloved sibling CAVEAT VENDITOR (“seller beware”), and occasionally, CAVEAT IDIOTA (“everyone beware”). SECTION II — LIABILITY WAIVERS The Dogs of War Tavern, its administrators, moderators, staff, agents, familiars, summoned spirits, forum software, banner icons, favicon, and personified coins assume no responsibility whatsoever for: the accuracy of any listing, the condition of any item, postal mishaps, customs seizures, paint adhesion failures, mismolded lead, warped resin, missing pikes, fraudulent Paymasters, or buyers who mysteriously disappear into the Border Princes. YOU acknowledge that all trades are private transactions between consenting hobbyists and that the forum has zero legal obligation to intervene, mediate, investigate, arbitrate, or retrieve goods lost to fate, folly, or the postal service. Any claim arising from a transaction in THE CONTRACT BOARD shall be directed solely at the other party involved and not at the Dogs of War Tavern, which expressly disclaims: liability, warranties, guarantees, assurances, promises, oaths, or pinky swears. SECTION III — USER CONDUCT REQUIREMENTS By posting in THE CONTRACT BOARD, YOU agree to: Represent items honestly and accurately, to the best of your non-professional, non-expert, wholly amateur ability. Communicate in good faith, without deception, delay, vanishing spells, or mysterious “change of heart” messages. Refrain from: price gouging, brigandry, bait-and-switch tactics, privateering, and any activity prohibited by basic human decency. Complete transactions promptly, unless mutually agreed otherwise in writing, on parchment, blood contract, or PM. SECTION IV — FORBIDDEN GOODS & CONDUCT The following are strictly prohibited: Stolen items (even if looted in a just and glorious tabletop battle). Counterfeit or recast miniatures without disclosure. Real weapons, real armor, or anything capable of actual bodily harm. Illegal goods in any jurisdiction, plane of reality, or Warhammer edition. Attempts to weaponize PayPal disputes. Summoning daemons into negotiations. Violators may be: banned, booted, banished, or sentenced to the Paymaster’s Ledger of Shame. SECTION V — INDEMNIFICATION (THE IMPORTANT PART) YOU agree to indemnify, defend, and hold harmless the Dogs of War Tavern and its associated mercenary captains from: * claims, losses, disputes, misunderstandings, bad trades, bad paint jobs, melted sprues, bent spears, missing shields, or any consequence arising from YOUR participation in THE MARKET. In plain language: If something goes wrong — it’s on YOU, not us. SECTION VI — ACCEPTANCE By posting in THE CONTRACT BOARD, YOU affirm that: You have read, acknowledged, understood, misunderstood, skimmed, or ignored these terms. You assume full responsibility for your actions. You accept that this Marketplace operates on goodwill, honesty, and the time-honored tradition of “Don’t Be A Jerk.” IN SUMMARY This is a community-run swap-shop. We provide the space — you handle the deals. Act honorably, trade fairly, and may your packages always arrive uncrushed. “By trading here, you acknowledge that you do so voluntarily, soberly, and without coercion — which honestly puts you ahead of most mercenaries.”
  • Discuss Warhammer Fantasy Battle here! Dogs of War, Regiments of Renown, you name it. Kings of War, Warhammer 3rd Edition or Warhammer Old World, and anything in between goes here.

    1 1
    1 Topics
    1 Posts
    WillmarkW
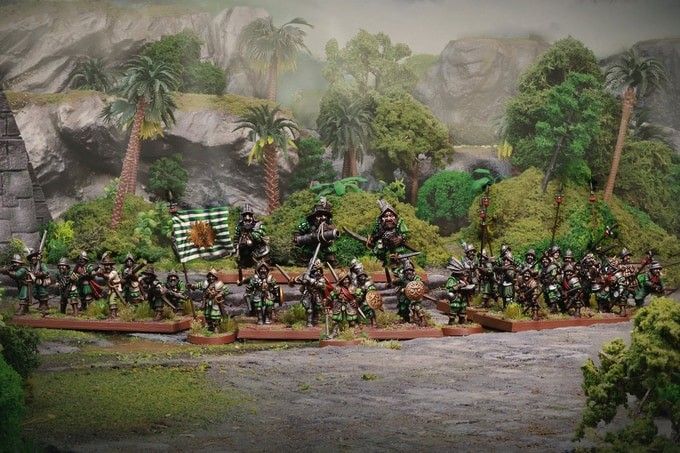
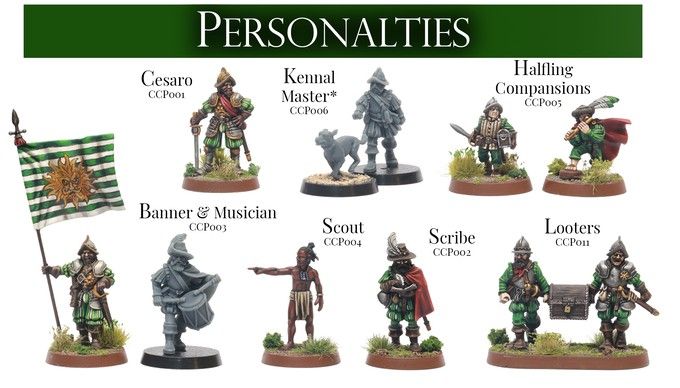
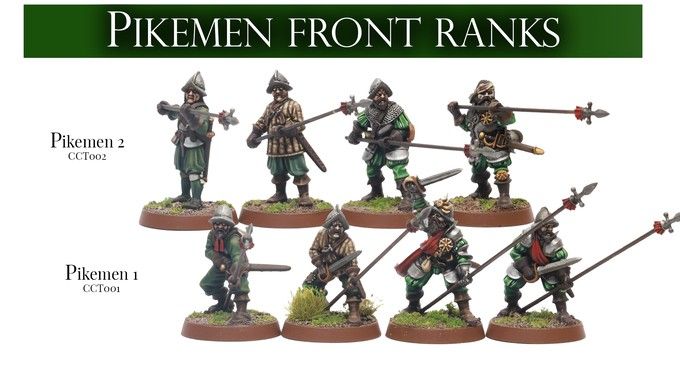
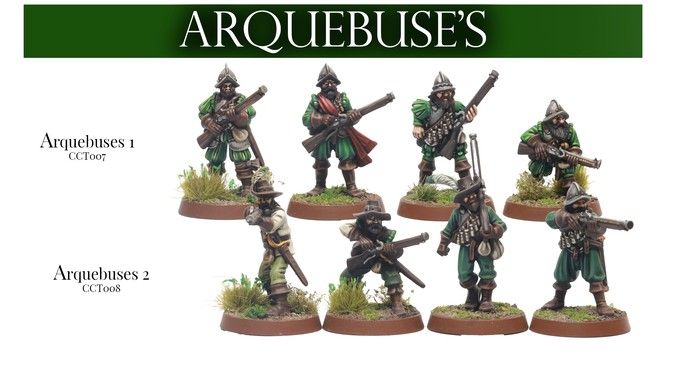
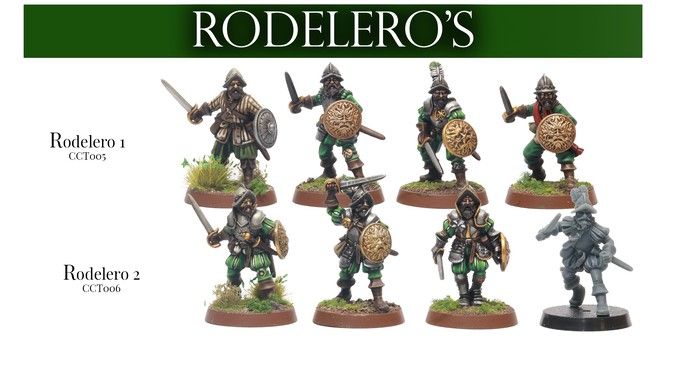
    The Border Princes are a wild place — half-forgotten forts, wandering mercenary bands, petty nobles, and hard-bitten soldiers of fortune. It’s the perfect home for your armies, painting logs, and long-term projects. Post your regiments, warbands, conversions, and full forces here. Share progress, discuss ideas, and show the muster of your collection as it grows from a handful of sellswords into a full company. Whether it’s five pikemen or five thousand points, if it marches under your banner, it belongs in the Border Princes.
  • Where painters, sculptors, engineers, and hobby artificers ply their trade. From humble brushwork to mad Tilean inventions — creativity begins here. Show off your Dogs of War army, mini-blog about assembling your force, or completed Dogs of War. Got a non-Dogs of War force? Post them here too.

    7 37
    7 Topics
    37 Posts
    ZambulaZ
    Hi, Since getting the classic miniatures today is both quite expensive and very difficult, I'm thinking about to custom Imperial units for a proper Dogs of War. And also I got a threat reasonable concern from my wife regarding the huge amount of grey miniatures, so reusing models seems smart, at least until I paint the rest! My current project for the Empire includes assigning the coat of arms and colours of the swiss cantons, one to each, so each unit represents one of them. For the Elite infantry (we are still talking about the Empire here) I thought about the Reiksguard on foot, painted with the colours of the Swiss Guard of the Pope. This also fits as bodyguard of the Archi-lector... Well, now DoW. I've been playing the whole summer (since I came back to the game) and some of the battles I played them with DoW. But as I do not have the proper models I either borrowed the models or proxied with Empire units. And it worked quite well, if you allow me. So now I need to think how to convert units from Empire to DoW. We'll need: Pikes! so far I can still using lances... I have some old imperial lancers that ahve broken lances, so I can repair them longer than they were. Easy to fix. Crossbows!: I got enough bits from the State Troops of the Empire to build models with crossbows. The basic tilean crossbowmen do not need shields nor anything fancy. Duellists! the Free Companies are quite the men for the job! I know they will look as "germanic" as the rest of the army, missing the "tilean" touch... which is part of the beauty! Heavy cavalry: The Knightly Orders of the Empire going rogue and serving the best paymaster sounds relatable to me. The miniatures are perfect. Light Cavalry: Now this is where the problems begin. I would rather using Kislevite ungors, as they are archers on horse. Another option may be bretonnian mounted yeomen? Cannons: The empire have them covered! Ogres and Dwarfs and Haflings: these can be reused from OgreBulls/Ironguts, basic Dwarfs with CC weapons or crossbows (of course, crossbows!) Paymaster's bodyguard: Now this is a pain in the ass! Because the common sense tells me to use either Greatswords or Reiksguard... but both are using Longswords! And the Bodyguards use Halberds... I have a little obsession with WYSIWYG. And the imperial Halberds feel not Elite enough for the job. For the mounts of the Characters: horses o pegasi, not a problem! I plan to magnetize some bretonnian pegasi for this matter. And for the Paymaster... I though about making a chess to put UNDER him (in 20mm square or 25x50mm for the horse-mounted version), so it is clear for everyone WHO is the paymaster... and if he gets captured the victor can attach the paychest to their unit. What do you guys think??
  • Reports, campaigns, scenarios, and tales of mercenary warfare — triumphs, disasters, and everything in between.

    4 45
    4 Topics
    45 Posts
    WillmarkW
    Damn Dark Elves (shakes fist!)
  • Lore, lists, documents, tomes, histories, maps, and all preserved knowledge of the Dogs of War. Everything is stored safely in the Vault — until someone pays enough to steal it.

    1 1
    1 Topics
    1 Posts
    WillmarkW
    This is the company’s library — a place where captains keep their ledgers, scribes store their parchments, and old campaign wisdom sleeps under dust. Here you’ll find army lists, lore, tactical notes, and the written record of mercenary commanders past and present. Share your strategies, regimental backgrounds, battle reports, and any documents worth preserving for future sellswords. If it belongs in a ledger, a tome, or an old campaign diary, it belongs in the Regimental Archives.
  • How to Unlock Silksong's Hidden Act 3 Without Missing 25% of the Game

    Hollow Knight: Silksong Act 3 guide reveals hidden quests and Silk and Soul wish requirements for unlocking Pharloom's secrets.

    Most players who roll credits in Hollow Knight: Silksong probably pat themselves on the back, believing they’ve seen everything Pharloom has to offer. Then the save file sits there, quietly judging them. The truth? They may have only finished about 75% of the game. Team Cherry tucked an entire Act 3 behind a chain of obscure chores, a few soul-collection errands, and one delightfully sneaky final choice. This guide breaks down the whole process, so nobody has to wander around Weavenest Atla wondering why the walls look so suspicious.

    Act 3 Requirements

    First things first: unlocking Act 3 is less about raw skill and more about not sprinting to the finish line like a startled Grub. A player needs to tick off a few boxes before the Caretaker even thinks about handing over the good stuff.

    Wish upon a star (or several): Complete most, if not all, of the wishes available in Bone Bottom, Bellhart, and the Choral Chambers in the Citadel. Some of these only wake up after certain side quests progress, so a little backtracking is basically a personality trait here.

    Flea market: No, not actual shopping. Hornet needs to round up enough fleas across the world for the caravan to haul itself over to the Putrified Ducts. She doesn’t need every single one, but a bit more than half keeps the wheels greased.

    Lace, but make it dramatic: Defeat Lace in The Cradle. Fighting her won’t slam the door on Act 3—it actually swings it wide open.

    Once those requirements are handled, the Caretaker at the first shrine stops being cryptic and finally offers the last wish: Silk and Soul.

    Silk and Soul Wish

    This wish is basically an interdimensional grocery run. Hornet zips through the world to collect souls and items from specific, slightly odd characters. Two of them might already be sitting in her inventory by the time the quest starts, which is a nice little head start.

    Item / Soul
    Location
    Combat Required?

    Snare Setter
    Weavenest Atla secret nook
    No

    Maiden’s Soul
    Moss Grotto, starting area west
    No

    Hermit’s Soul
    Bellhart, east secret passage
    No

    Seeker’s Soul
    Bilehaven, after Groal the Great
    Yes ✔

    Snare Setter

    The Snare Setter is a bashful little gadget hiding in Weavenest Atla, which sits below Bone Bottom and east of Moss Grotto. Any player who enjoys poking into corners has probably been here before—Eva hangs out nearby, offering persistent upgrades that make Hornet feel like a fully kitted-out needle warrior.

    To reach the item, Hornet needs the double jump from Mount Fay. No double jump, no secret room. She should travel down, use the Needolin to play a song at the door, take the elevator to the bottom level, and head right. Instead of blundering into the next room, she can hop up the wall to the second level and slip through the left door. Right before the pond, a double jump reveals a secret area, and there the Snare Setter waits on a small podium like a shy trophy.

    Maiden’s Soul

    While she’s in the neighborhood, Hornet can head back to the top of Moss Grotto and then west to the very spot where the adventure began. The Chapel Maid is hanging around, probably wondering why nobody visits. One chat later, she happily hands over her soul. Easy peasy.

    Hermit’s Soul

    The Bell Hermit in Bellhart is about as cheerful as a wet charm notch, but he’s surprisingly generous when Hornet asks for his soul. She just needs to find the secret passage east of the fast travel station. A quick conversation, and the grumpy old man parts with it like a man donating a coat he never liked anyway.

    Seeker’s Soul

    Now the errand list gets spicy. The Seeker’s Soul demands actual combat. Hornet has to take down Groal the Great, the final boss of the Bilewater region, at the top of Bilehaven. Yeah, that means trudging through a whole network of nasty, maggot-infested waters first. No pressure.

    After slaying Groal, she hops up to the left and enters the little house just outside the arena. Inside, the Seeker’s Soul lies on the ground beneath the strung-up Seeker, which is grim but also conveniently placed.

    Setting the Trap

    With all the ingredients stuffed into Hornet’s inventory, the next stop is the First Shrine. Talking to the Caretaker completes the wish, and the path forward becomes clear: climb The Cradle, speak to the Caretaker at the top, and march into the final boss fight.

    The clever part comes after defeating Grand Mother Silk. The game offers two choices: Bind or Needolin.

    Bind: End the game right there, roll credits, and accidentally lock out Act 3 for that playthrough. Oops.

    Needolin: Spring the trap. Grand Mother Silk and Lace get unceremoniously dragged into the Abyss. It’s dramatic, a little mean, and exactly what the story ordered.

    After the credits, the save file doesn’t look quite right. Black threads coil around it like an overprotective spider. Cutting away at it with the confirm button unlocks Act 3, and suddenly the game isn’t over at all.

    So the takeaway is simple: don’t rush the finale. Do the wishes, find the fleas, be nice to the Chapel Maid, and keep that Needolin handy. Act 3 has been hiding in plain sight, waiting for someone patient enough to poke it with a needle.

    For players who enjoy uncovering every hidden nook and secret timeline, being patient doesn’t just apply to in-game mechanics—it also pays off when planning the next purchase. A game as rich as Hollow Knight: Silksong rewards careful observation, but staying updated on launch discounts, special editions, or rare merchandise can take the same kind of vigilance. After all, none of those DLC reveals or collector’s editions will find their way into your cart by themselves.

    Rather than refreshing store pages every single day, let [this price tracking tool]( keep an eye on price drops and restocks for you. That way, you can spend more time studying the secrets of Pharloom and less time bargain hunting—and when the next surprise update arrives, you’ll already be ready to dive back in.

    https://dealnesthq.com

    read more

  • Hollow Knight: Silksong — Surviving The Mist, Beating Phantom, and Unlocking Parry

    Silksong guide details The Mist and Exhaust Organ, offering tips for Wraiths, Needolin puzzles, and unlocking Cross Stitch.

    I’m not going to sugarcoat it: Bilewater is one of the most unpleasant stretches of Pharloom I’ve dragged myself through, and the first time I stepped into The Mist, I immediately regretted my curiosity. But after enough deaths, enough Wraith screeches, and enough Needolin notes echoing through fog, I started to understand the method behind the madness. If you’re trying to reach the Exhaust Organ, rescue a very distressed Flea, and unlock Cross Stitch so you can parry for the rest of your run, here’s exactly how I did it.

    Entering The Mist

    You won’t find a fixed route here, and that’s by design. The layout of The Mist is randomized every time you enter. The one mercy is that your Cocoon always spawns near the entrance, so if you fall, you won’t lose too much progress. From there, I learned to stop hugging walls and start looking for small, glowing butterflies. When you play your Needolin near them, they float upward. Once you stop playing, they fly toward the correct exit.

    The problem? The Wraiths won’t give you a quiet moment to perform. This is why I always come into The Mist with Straight Knives or Cogflies in my loadout. Ranged options let me swat away the screeching ghastly women without closing distance and risking a fall. My usual loop looked like this:

    Clear Wraiths with a ranged tool.

    Find a glowing butterfly.

    Play the Needolin long enough to make it rise.

    Stop playing and follow it.

    Repeat until the fog opens up.

    After a couple of correct exits, you’ll notice a straightaway. That’s the game’s way of telling you that you’re on the right path. A few more correct butterfly choices after that, and you’ll step into the Exhaust Organ.

    Pushing Through the Exhaust Organ

    The Exhaust Organ wastes no time reminding you where you are. The first room is full of those maggot-infested waters that Bilewater seems to love, and there’s no way around them. I took a deep breath, dove in, and headed left. Once inside the central building, I jumped up the platforms, moved left, climbed the wall, and slashed the bench free from its webbing. That bench is important if you want a checkpoint in this stretch.

    After that came the steam gauntlet. The pipes on the right follow a fairly linear route, but the timing is everything. I went up to the right, then up and left, then slid down left before moving forward again. When I reached the middle pipe, I broke it open and played my Needolin for the unsettling tube just to hear the bonus lore. From there, I climbed the middle tube, slid down right, wall-jumped up the next section, and made the final climb. There was silk waiting to the right, and Phantom waiting to the left.

    Beating Phantom

    Phantom is a showstopping longnail fighter. She takes big stabs at your position and frequently raises her guard to parry you. My first instinct was to wait out her guard, but I actually had better results doing the opposite.

    I started hitting her guard on purpose. Whenever she parries, you can almost always jump, move toward her current position, and dodge the parry entirely. That leaves her open for a couple of cheap shots before she recovers. It sounds reckless, but it made the first phase much faster.

    Phase
    Attack
    How I Handled It

    Phase 1
    Guard / parry stance
    Hit her guard intentionally, jump toward her, dodge the parry, punish

    Phase 2
    Giant laser pillars
    Dash out of the glowing columns, wait for the hitbox to clear, then attack

    Phase 2
    Needle toss
    Dodge it, then close distance in the middle of the arena

    Phase 2
    Floor shuffle
    Stay mobile and avoid touching her while she shifts across the boards

    The second phase starts with Phantom firing massive laser blasts that cover half the arena. As intimidating as it looks, I found this to be her easiest attack. I just dashed away, avoided the big glowing pillars, and waited for the hitbox to disappear before punishing her. The needle toss is also a great opening if you dodge it and hit her in the center of the arena. At the end, make sure you hit the QTE prompt. It’s about as forgiving as they come, and completing the fight unlocks your Parry.

    Don’t Miss the Flea

    Before you leave the Exhaust Organ, there’s one easily missed detour. From the boss arena, I went right, fell down, went left, then climbed up and to the left before jumping the gap. In the room with silk-strewn tubes, I ran right past the thread-wrapped cylinders and into a hidden area. From there, I dropped down, exited through the left door, and crossed the floating platforms carefully.

    All the way to the left, there’s more of that lovely infested liquid to hop across. If you make it, you’ll find a Flea making very concerned noises. Save it. It’s a short detour that I nearly skipped on my first run, and it absolutely matters.

    How to Parry with Cross Stitch

    Parrying in this game is not what you might expect from other action titles. You can’t simply press a button whenever you want. Cross Stitch is a Silk Skill, and it costs four bars of Silk to use. When I activate it, Hornet enters a parry stance for a little over half a second. If she’s hit during that stance, she responds with an animation of constantly slashing at the spot where she took damage.

    That distinction matters. If you parry a projectile, you won’t take damage, but you may completely miss the enemy if the projectile was far away from them. On the bright side, Cross Stitch has a very generous hitbox, so if you’re within a few feet of the enemy, it will probably land. After the parry finishes, you also get a few frames of complete invulnerability.

    Because the attack tends to place you directly on top of the enemy, I make a habit of dashing away after every successful parry. That way I don’t eat a random hit during the recovery window. It’s one of those skills that feels awkward at first, but once you get used to the rhythm, it turns Phantom’s own aggression against her and becomes essential for later fights in the Underworks.

    That’s how I finally pushed through The Mist, cleared the Exhaust Organ, and unlocked Cross Stitch. If you’re still getting lost in the fog, lean on the butterflies, keep a ranged option equipped, and don’t be afraid to provoke Phantom’s guard. The parry is worth the struggle.

    Fighting through the Exhaust Organ and earning Cross Stitch is just one milestone in a game packed with challenges like it. There are more bosses waiting deeper in the Underworks, each with their own rhythms to learn, and mastering the parry now will pay off again and again as you push forward.

    If you haven't started your run yet, it might be worth waiting for a discount before diving into Pharloom. Silksong frequently appears in promotions, and a reliable [steam sale tracker]( can help you spot the best price without refreshing the store page every day. DealNest makes it easy to monitor price drops across Steam and other platforms, so you can grab the game at the right moment and spend your saved coins on more important things — like practicing that parry window.

    https://dealnesthq.com

    read more

  • How to Complete the Lost Merchant Quest in Hollow Knight: Silksong

    Struggling with Hollow Knight: Silksong's Lost Merchant quest? Track Jubilana through Memorium using Faydown Cloak and scent trail to bring her home.

    Any Hollow Knight: Silksong fan worth their salt knows that exploration is the bread and butter of the game. But every so often, a side quest crops up that makes even the most seasoned players scratch their heads. Enter the Lost Merchant quest, where Jubilana decides to go walkabout for the second time. If you've already wrapped up the Balm for the Wounded quest, you might have noticed that her little shop in Songclave is looking, well, a bit lonely. Don't sweat it though — tracking her down is easier than you'd think, especially once you know where to look.

    How to Start the Lost Merchant Quest

    First things first — you can't just waltz into this quest cold. The Lost Merchant side quest only becomes available after completing the Balm for the Wounded quest. Once that's done and dusted, a new request will appear on the Wish Board in Songclave. Take a gander around town, and you'll quickly realize that Jubilana has pulled a disappearing act again. She's gone missing not once, but twice now, with her first vanishing act tied to the Wandering Merchant quest. This time around, it's up to you to play detective and bring her back home.

    Here's the good news: you won't need to traverse half of Pharloom to find her. She's holed up in a sub-area of the Citadel called Memorium. That said, if you don't know the route, you could easily spend hours wandering around like a headless chicken.

    How to Find Jubilana in Memorium

    The route to Memorium starts by heading west from Songclave. Keep pushing through until you reach an area covered in grass with an opening in the ceiling. Here's the catch: you'll need the double jump ability — better known as the Faydown Cloak — to reach that opening. If you haven't snagged it yet, don't panic, but it's a non-negotiable for this quest. Once you've got it, jump up through the ceiling and into Memorium.

    Now comes the fun part: tracking. Make your way through the rooms that lead east and keep your eyes peeled for Jubilana's items scattered on the ground. Interacting with them will create a scent trail that points you in her direction. It's a nifty little mechanic that makes the search feel a lot less like a wild goose chase.

    Keep pressing east, and you'll eventually stumble upon a room with a contraption displaying a map of the Citadel. You can spend 70 Rosaries to grab that map if you're feeling flush. But to find Jubilana, you'll want to jump into the opening in the ceiling to access a secret area. It's one of those classic Silksong moments where the path forward is hidden in plain sight.

    From there, head east once more to reach the outside and drop down to the platform below. Before you can have a proper chinwag with Jubilana, though, a wave of bird enemies will swoop in to ruin the reunion. It's not the toughest scrap in the game, but keep your wits about you. Once you've cleared the feathered fiends, approach Jubilana and exhaust her dialogue to wrap up the Lost Merchant quest.

    The Lost Merchant Quest Rewards

    Now for the good stuff. Completing the Lost Merchant quest expands Jubilana's inventory back in Songclave, and she'll have some seriously tempting new wares up for grabs. Here's what's on offer:

    Item
    Type
    Price
    Description

    Spider Strings
    Support Tool
    350 Rosaries
    Resonates with music to amplify a performance. Expands and strengthens the effects of the Needolin.

    Craftmetal
    Trade Item
    180 Rosaries
    Can be traded to various merchants in exchange for goods.

    Spool Fragment
    Upgrade Material
    500 Rosaries
    Increases the size of the Silk Meter.

    Choral Commandment
    Relic
    210 Rosaries
    A relic of Pharloom's past, interesting to collectors.

    If you're wondering where to splash your hard-earned Rosaries first, the Spool Fragment is the smart money. It boosts your Silk Meter — one of the most impactful quality-of-life upgrades in the game. Just keep in mind that you'll need two Spool Fragments to actually see an increase in your Silk Meter capacity, so don't celebrate too early. The Spider Strings are also a solid pick if you lean on the Needolin, but the Spool Fragment takes the cake for overall utility.

    All in all, the Lost Merchant quest is a classic Silksong side adventure — a bit of tracking, a bit of fighting, and a whole lot of reward. It's the kind of quest that flies under the radar but delivers some genuinely valuable loot for those willing to go the extra mile. So grab your Faydown Cloak, follow the scent, and get Jubilana back where she belongs. 🕹

    Much like venturing off the beaten path in Silksong rewarded you with Jubilana's hidden wares, a little extra effort when shopping for your gaming setup can pay off handsomely too. Between new releases, hardware upgrades, and the countless accessories that make those long sessions more comfortable, the costs can add up quickly — which is why savvy players know that finding the latest sales and discounts is its own kind of quest. When you want to stretch your budget without compromising on quality, [DealNest]( takes the guesswork out of the hunt, rounding up the best offers across a wide range of products in one easy-to-browse spot.

    Whether you're on the lookout for the next great indie gem to follow up your Silksong adventure or simply looking to snag a quality upgrade for your battlestation, pairing your passion for gaming with a little smart shopping is a strategy that never misses. A deal well found can be just as satisfying as a treasure well earned.

    https://dealnesthq.com

    read more